Image Rotator
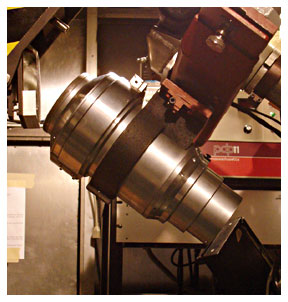
Image Rotator installed position
Installing the rotator is relatively easy.
- On the auxiliary panel hold the Rotator IN toggle switch until the rotator is in position. There is a limit switch that will stop its motion when in the proper position.
- Tighten the screw on the rotator installation arm fully to ensure that the rotator is solidly in the proper position.
- Remove the top and bottom covers on the rotator.
- If you are using the CAT telescope, you will need to install the two turning mirrors to direct the light through the image rotator. One of these mirrors attaches to the bracket above the image rotator. The second installs on a bracket just above the rotator installation arm screw. Note: You should install these mirrors after you have taken your polar quartz flat fields, as the turning mirrors block the quartz lamp.
- Turn on the image rotator. There are two switches: one for the power and one for the power test indicator lamp. When the power test lamp is turned on, it will illuminate if there is power being supplied to the image rotator. Please turn off the test lamp when not needed so that it doesn't illuminate the slit of the Hamilton spectrograph during observations.
Operation of the image rotator is as follows.
- Point telescope at object and center on slit.
- Rotate the outer ring to the current hour angle.
- Rotate the inner ring to the desired position angle. This angle depends
on whether you are using the image rotator at the CAT or 3-m telescope.
For the 3-m telescope there is approximately a 2.5 to 3 degree error in the alignment so,
use the folowing formulae for the position angle:
- If PA <= 183 deg, set the image rotator PA to PA - 3.
- If PA > 183 deg, set the image rotator PA to PA - 183.
- If PA <= 180 deg, set the image rotator PA to 180 - PA.
- If PA > 180 deg, set the image rotator PA to 360 - PA.
- Set the image rotator position angle on the Guide Parameters Tab in the autoguider software.
- For the 3-m set the E/W sign in the autoguider software to -1. For the CAT set the E/W and N/S signs in the autoguider softwear to -1.
- Make sure star is centered on the slit and start guiding.
- Take exposure.
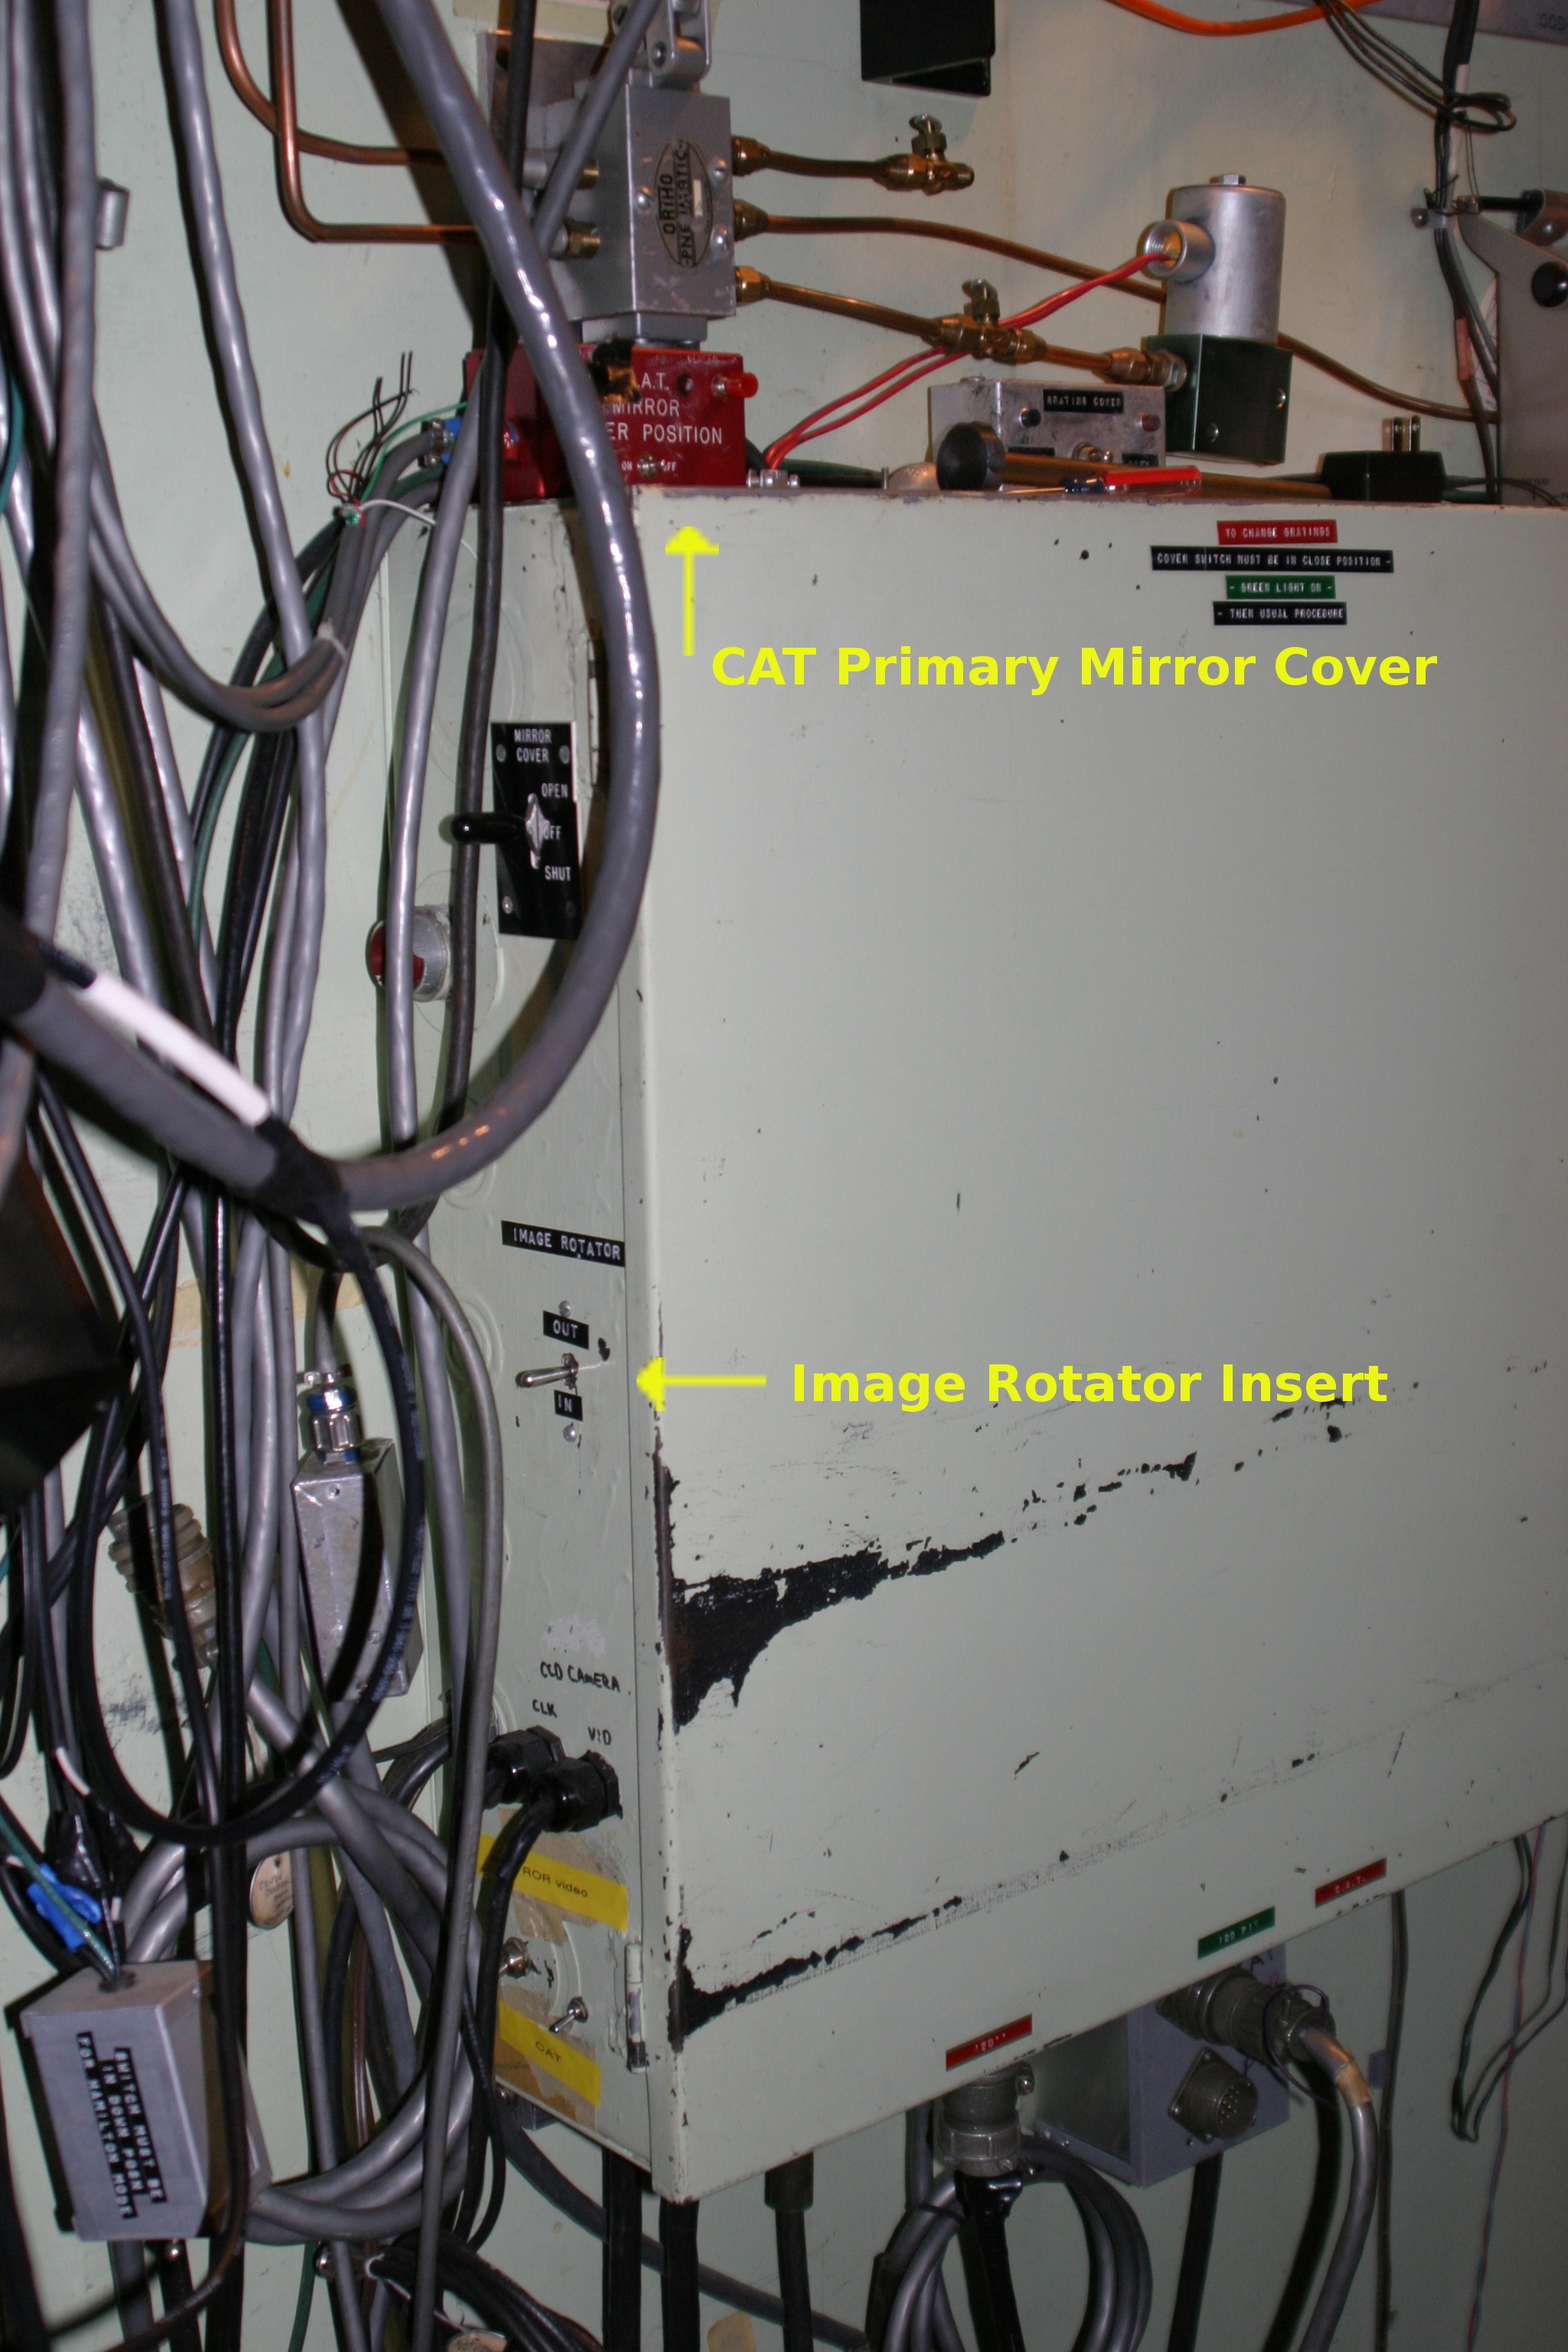
Image Rotator Insert Switch |
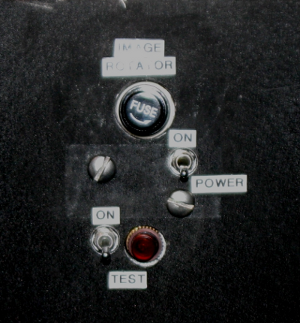
Image Rotator Power Switch |
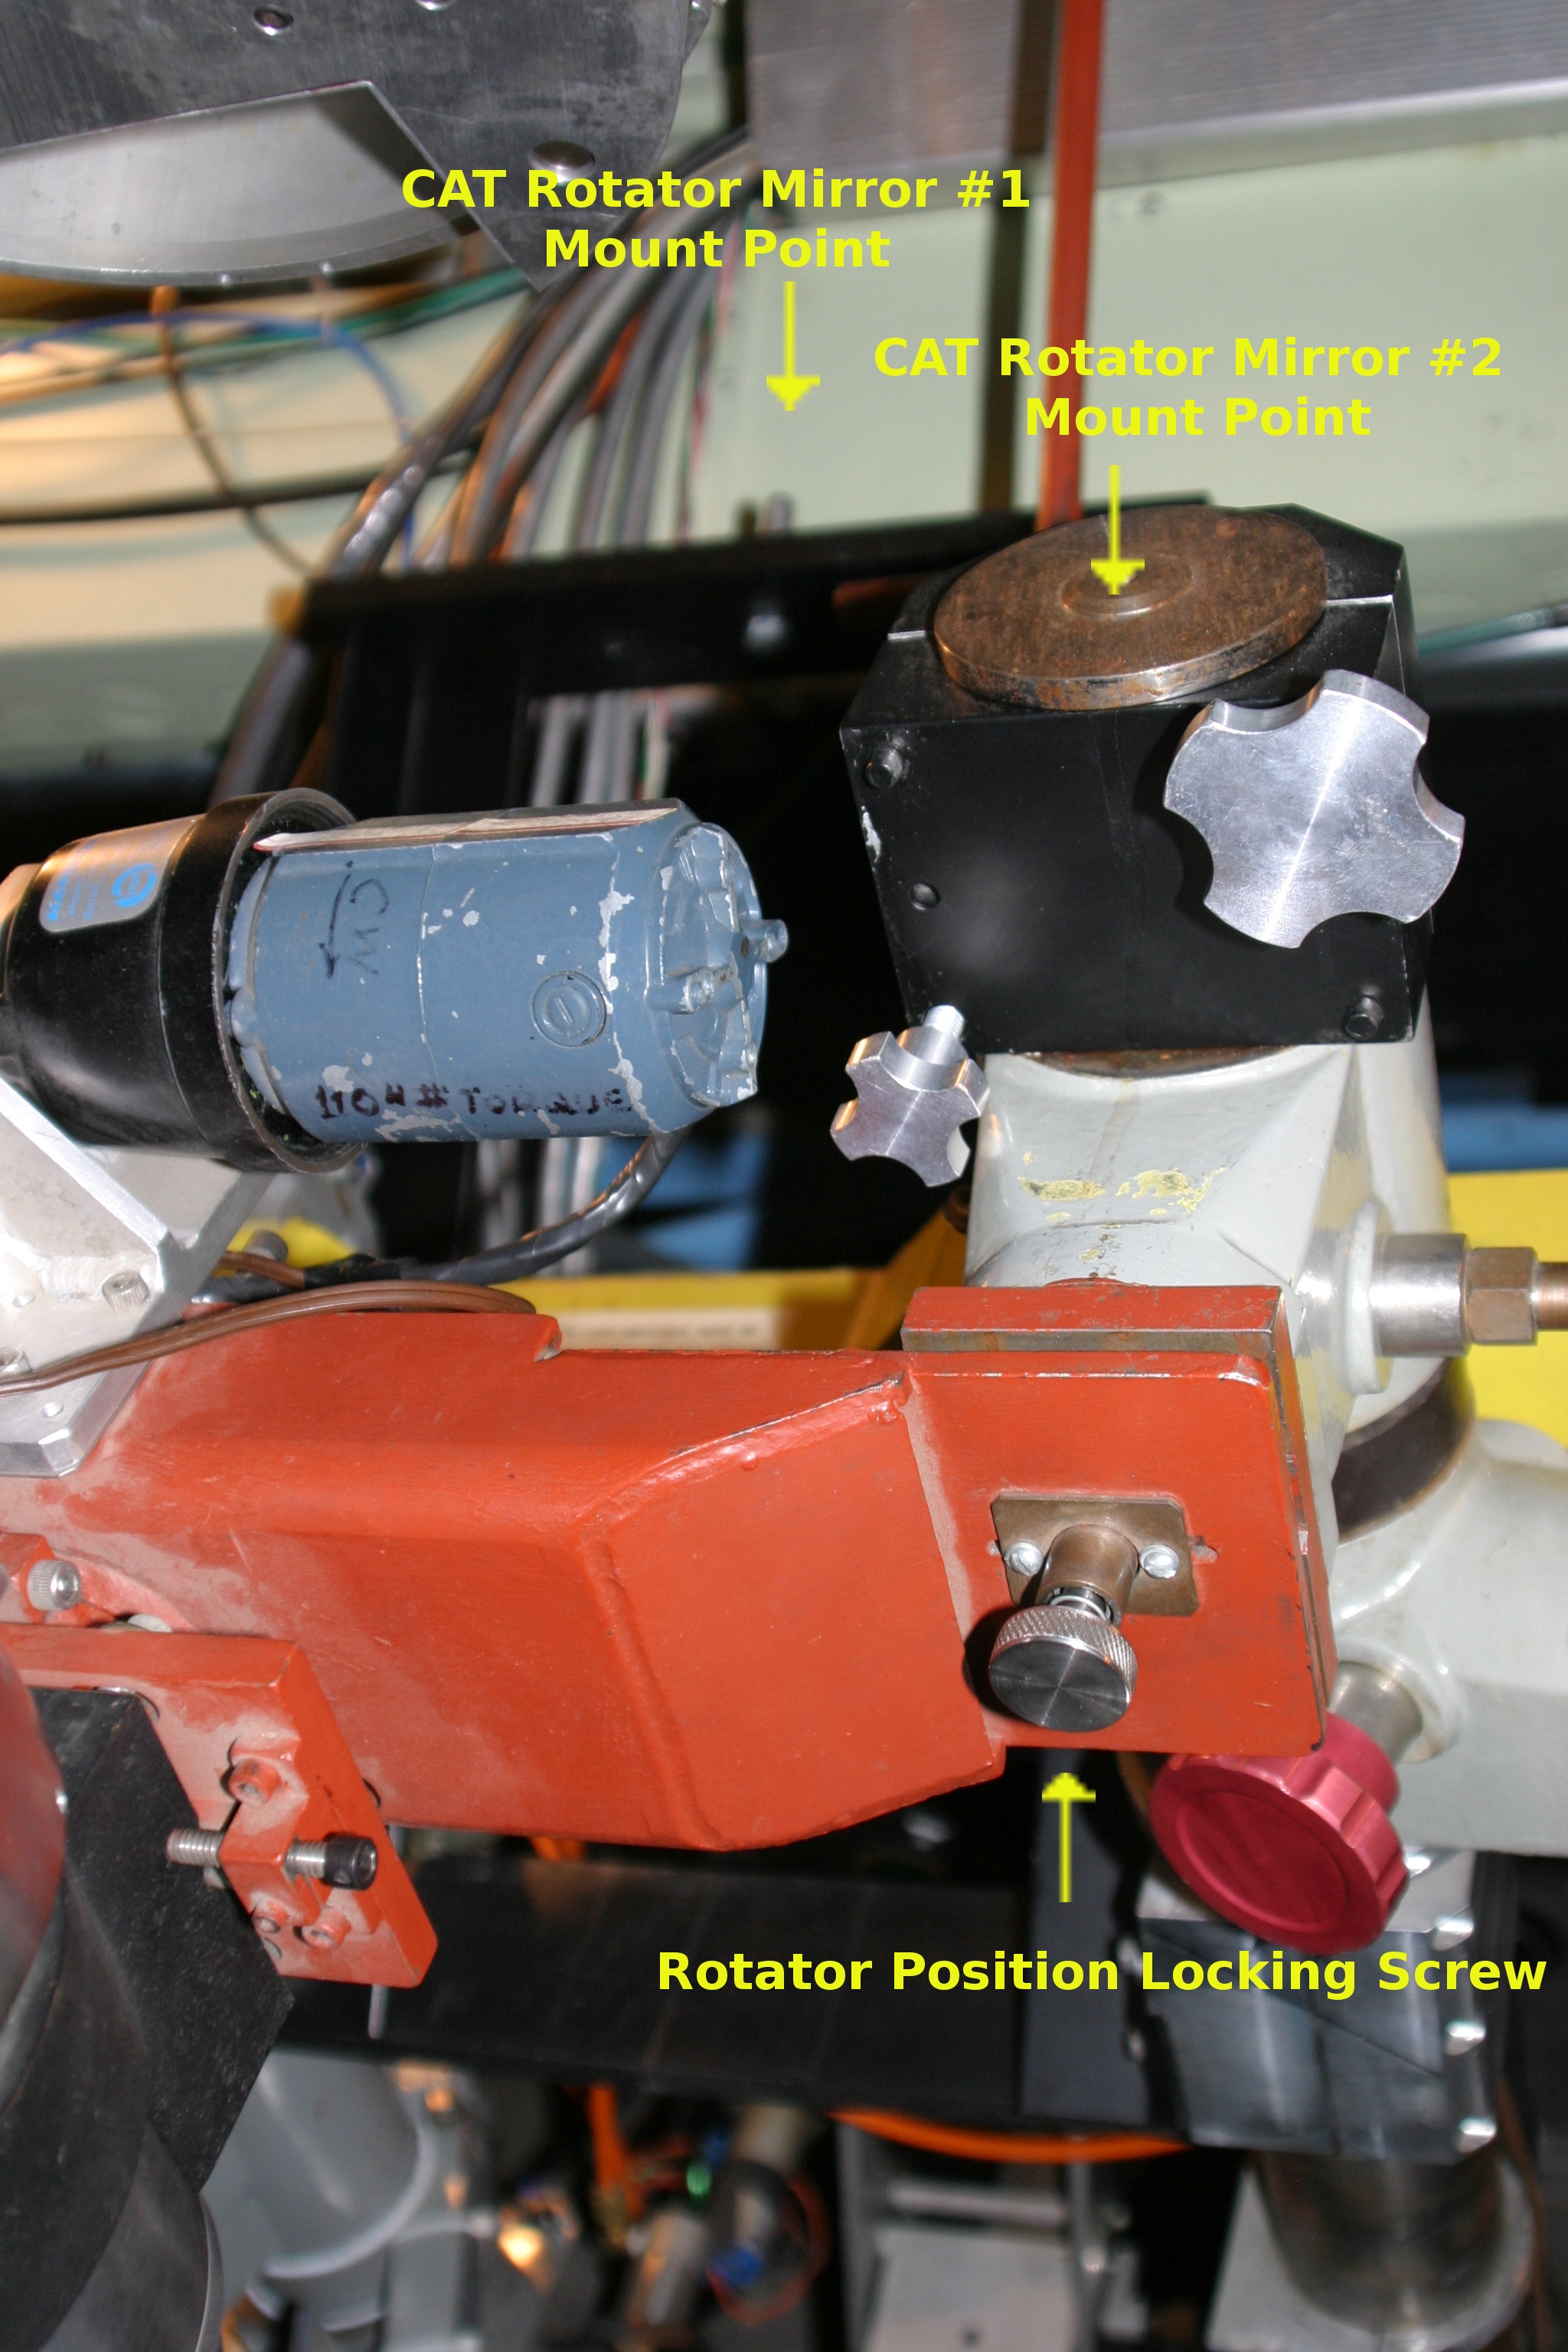
CAT Rotator Mirror Mounts |

CAT Rotator Mirror Positions
| ||
Support Astronomers (sa@ucolick.org) Last modified: Sun Feb 13 18:02:38 PST 2011